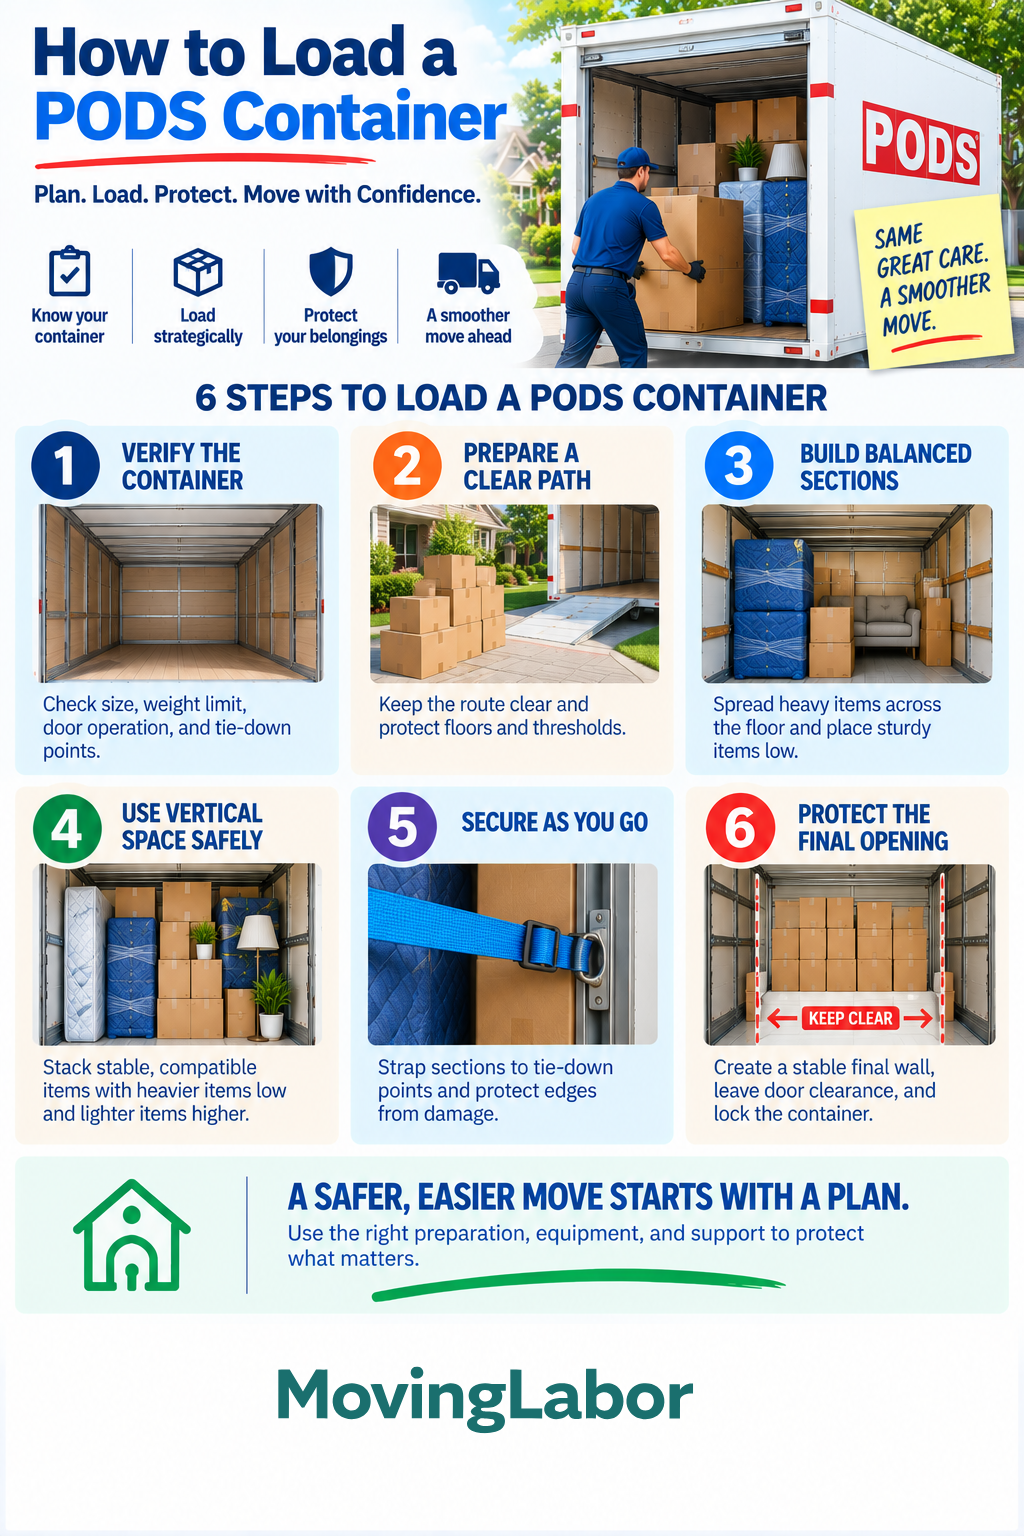
Load a PODS container by verifying the delivered unit, planning around its interior and weight limit, distributing weight evenly, building secured sections, protecting belongings from moisture, and keeping the door path clear.
This guide connects four decisions in the Loading & Unloading plan: verify the specific container, prepare a ground-level path, build balanced sections, and use vertical space safely. Loading and unloading are safety-critical stages. The useful standard is not merely fitting everything inside; it is controlling each item through the route, distributing weight, protecting surfaces, and keeping the load stable during transit.
Quick Answer
Start with the Verify the specific container step, then complete Prepare a ground-level path, and verify Build balanced sections before the move becomes time-critical.
Before the active move window, document what will happen for the Verify the specific container, Prepare a ground-level path, and Build balanced sections steps. If one assumption changes, review the remaining steps instead of forcing the original estimate or schedule.
Step-by-step plan
1. Verify the specific container
Check the delivered container's dimensions, weight limit, door operation, tie-down points, prohibited items, and pickup date.
PODS currently lists maximum content weights of 5,200 lbs for an 8-foot container, 4,700 lbs for a 12-foot container, and 4,200 lbs for a 16-foot container. Container dimensions may vary slightly, so plan around the unit actually delivered and your current rental agreement.
2. Prepare a ground-level path
Protect floors and thresholds and keep the route clear between the home and container.
PODS containers are designed for ground-level loading, so there is normally no truck-height loading ramp to climb. Keep the approach clear and make sure furniture, dollies, and boxes can move safely along the entire route.
3. Build balanced sections
Spread heavy items throughout the container floor, place sturdy and heavy items low, and work from the back toward the door.
Do not load all heavy belongings first or concentrate most of the dense weight on one side or end of the container. PODS specifically recommends distributing weight throughout the container.
4. Use vertical space safely
Stack compatible boxes and upright protected furniture only when each piece is stable and supported. Keep heavier belongings lower and lighter items higher.
Use the available vertical space without creating top-heavy or unstable stacks. Leave enough clearance near the door's barrel roll so tall items do not interfere with door operation.
5. Secure as you go
Strap completed sections to the container's available tie-down points and protect edges where tension could damage furniture or boxes.
PODS recommends using rope or straps at regular intervals as the container is loaded rather than relying only on restraint at the door. Most PODS containers have interior eyelets, while newer models may use e-track slots; customers provide their own straps.
6. Protect the final opening
Create a stable final barrier, leave clearance for the door, photograph the completed load, and lock the container before pickup.
PODS recommends creating a final barrier approximately 6 inches from the door to help keep belongings from shifting against it and causing a door jam. PODS currently recommends either a 2¾-inch disc lock or a 1¾-inch padlock.
Protect against moisture
Make sure belongings are dry and free of moisture, mold, or mildew before loading. Avoid loading in the rain when possible.
PODS containers are weather-resistant rather than completely waterproof, and PODS recommends considering moisture absorbers to help reduce mold, mildew, and odors. Items that are particularly sensitive to temperature or humidity may require a different storage environment.
Decision checkpoints
- Before booking — Prepare a ground-level path: Record who owns this step, its deadline, and the written or visible confirmation that it is complete.
- Before work begins — Use vertical space safely: Record who owns this step, its deadline, and the written or visible confirmation that it is complete.
- Before closing out the job — Protect the final opening: Record who owns this step, its deadline, and the written or visible confirmation that it is complete.
Move-day checklist
- Review the Verify the specific container decision
- Verify the Build balanced sections details
- Complete the Secure as you go step
- Pathway clear and protected
- Furniture and floors protected
- Belongings dry before loading
- Dense weight distributed throughout the container
- Completed sections secured
- Door and barrel-roll clearance checked
- Container locked before pickup
Common mistakes to avoid
- Relying on a generic container size instead of the delivered unit. Revisit verify the specific container and confirm the dimensions, weight limit, and features of the unit you receive.
- Loading one side or one end with most of the dense weight. Revisit build balanced sections and distribute heavy belongings throughout the container.
- Allowing contents to press against or jam the roll-up door. Revisit protect the final opening and leave adequate clearance around the door and its mechanism.
- Loading damp belongings. Make sure furniture, boxes, fabrics, and other belongings are dry before they enter the container.
Where professional moving labor fits
For How to Load a PODS Container, professional labor can provide the crew for planned loading or unloading work. Share the container size, inventory, difficult-item photos, access conditions, and pickup deadline so the crew can evaluate the route and load rather than relying on a generic room count.
Use PODS loading and unloading help or the Truck and Container Calculator on MovingLabor.com to continue planning. For this guide, apply the result to the Verify the specific container step and confirm the final scope, availability, minimums, and price in writing.