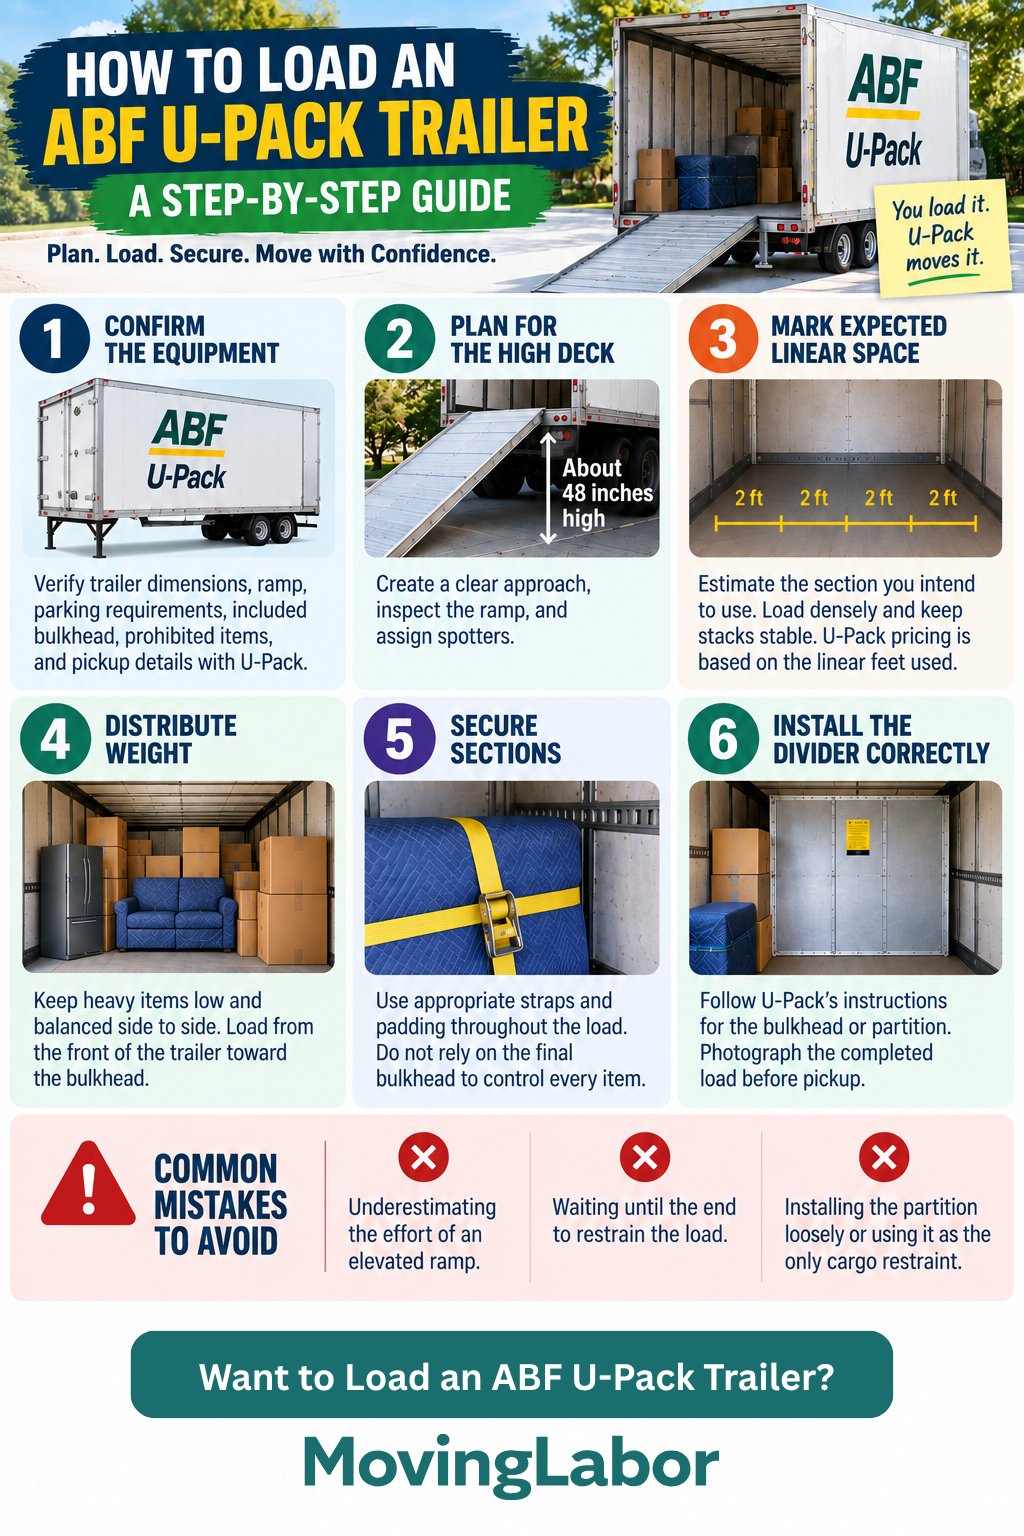
An ABF U-Pack moving trailer is typically loaded by the customer or hired labor, with charges tied to the space used. Plan for the elevated trailer floor and ramp, build a dense balanced load, and install the supplied partition or bulkhead exactly as instructed.
This guide connects four decisions in the Loading & Unloading plan: confirm the equipment, plan for the high deck, mark expected linear space, and distribute weight. Loading and unloading are safety-critical stages. The useful standard is not merely fitting everything inside; it is controlling each item through the route, distributing weight, protecting surfaces, and keeping the load stable during transit.
Quick Answer
Start with the Confirm the equipment step, then complete Plan for the high deck, and verify Mark expected linear space before the move becomes time-critical.
Before the active move window, document what will happen for the Confirm the equipment, Plan for the high deck, and Mark expected linear space steps. If one assumption changes, review the remaining steps instead of forcing the original estimate or schedule.
Step-by-step plan
1. Confirm the equipment
Verify the ABF U-Pack trailer dimensions, ramp, parking requirements, loading window, included partition or bulkhead, prohibited items, and pickup process with U-Pack.
2. Plan for the high deck
Create a clear approach, inspect the ramp, and assign spotters because the U-Pack trailer floor is approximately 48 inches above the ground.
3. Mark expected linear space
Estimate the section you intend to use and prioritize dense, stable loading without creating unsafe stacks. U-Pack trailer moves are priced based on the linear feet of trailer space used, subject to current reservation terms.
4. Distribute weight
Keep heavy items low and balanced side to side while building from the front of the trailer toward the partition.
5. Secure sections
Use appropriate straps and padding throughout the load; do not rely on the final partition to control every item.
Install the divider correctly
Follow the current U-Pack instructions for installing and securing the bulkhead or partition, and photograph the completed load before pickup. The bulkhead separates your belongings from the remaining trailer space and should not be used as a substitute for properly securing the load.
Decision checkpoints
- Before booking — Plan for the high deck: Record who owns this step, its deadline, and the written or visible confirmation that it is complete.
- Before work begins — Distribute weight: Record who owns this step, its deadline, and the written or visible confirmation that it is complete.
- Before closing out the job — Install the divider correctly: Record who owns this step, its deadline, and the written or visible confirmation that it is complete.
Move-day checklist
- Review the “Confirm the equipment” decision
- Verify the “Mark expected linear space” details
- Complete the “Secure sections” step
- Furniture and floors protected
- Dense weight spread across the floor
- Each load section restrained
- Bulkhead installed according to current U-Pack instructions
Common mistakes to avoid
- Underestimating the effort of an elevated ramp. Revisit plan for the high deck and update the plan before this assumption changes safety, timing, equipment, or cost.
- Waiting until the end to restrain the load. Revisit distribute weight and update the plan before this assumption changes safety, timing, equipment, or cost.
- Installing the partition loosely or using it as the only cargo restraint. Revisit install the divider correctly and update the plan before this assumption changes safety, timing, equipment, or cost.
Where professional moving labor fits
For How to Load an ABF U-Pack Trailer, professional labor can provide the crew for the planned loading or unloading work. Share the inventory, difficult-item photos, access conditions, equipment type, and deadline so the crew can evaluate the route and load rather than relying on a generic room count.
Use U-Pack loading and unloading help or the Truck or Container Calculator on MovingLabor.com to continue planning. For this guide, apply the result to the Confirm the equipment step and confirm the final scope, availability, minimums, and price in writing.